Scribble Booth Review: Is BoothActive's Neon Booth Worth It?
Key Takeaways
- The BoothActive Scribble Booth (aka the Neon Booth) runs $3,500 USD for the full kit and is built with portable tension fabric
- The backdrop is not optional if you want the writing to actually be legible on video
- Camera brightness settings require trial and error since every camera's refresh rate is different
- Two booth attendants make the experience run more smoothly than one
- It's built for portable events, not permanent installs, though one operator has made a permanent install work
If you've been scrolling social media anytime in the last year, you've probably seen a scribble booth video. Someone stands in front of a glowing pane of glass, writes a message or signs their name, and the whole thing lights up on camera like something out of a music video. It went viral fast, and now photo booth founders everywhere are asking the same question: should I add one of these to my lineup?
I wanted a real answer, not a marketing pitch. So I got my hands on the Scribble Booth by BoothActive, assembled it myself, ran it at a live event with a crowd, and I'm giving you the complete, unfiltered review here.
This is what actually happened when I put this scribble booth through a real test.
What Is the Scribble Booth by BoothActive?
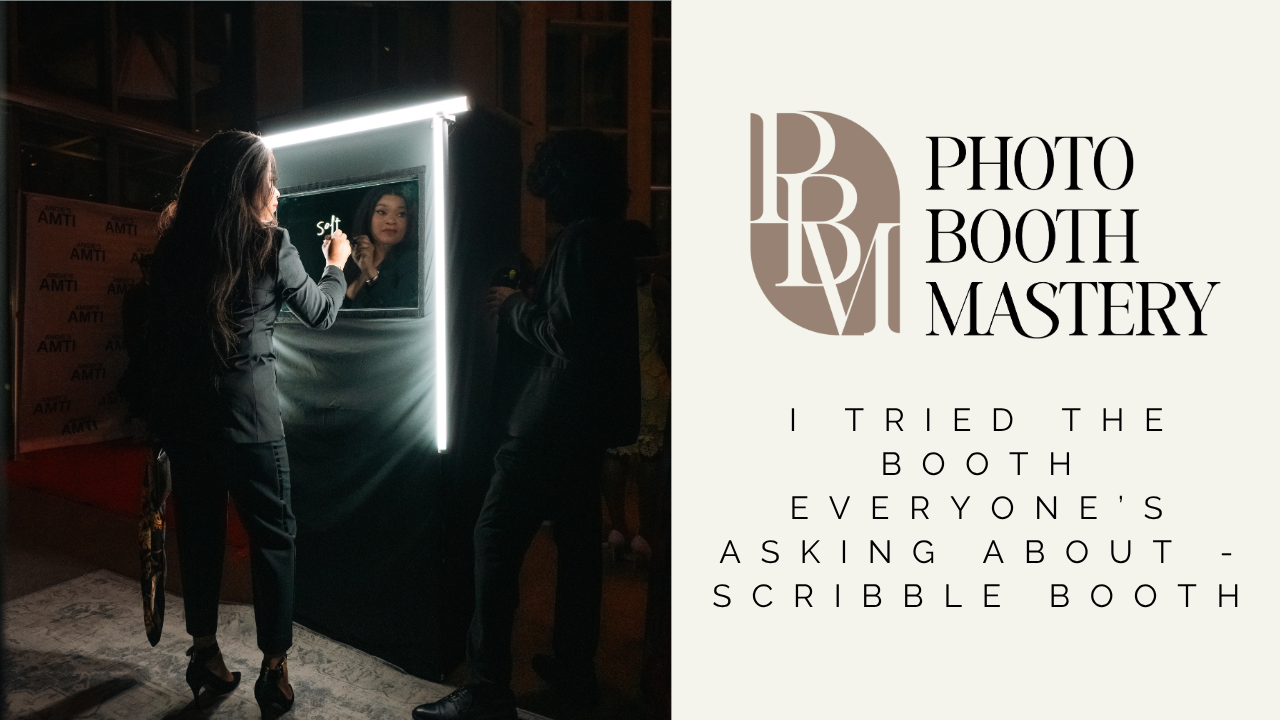
BoothActive actually calls their product the Neon Booth, though most people search for it as a scribble booth. It's a fully portable, modular booth built with tension fabric, designed so guests can write, sign, or draw on an illuminated glass panel while a hidden camera captures video of the whole thing.
The full kit runs $3,500 USD as of this review, and BoothActive is a US-based company that ships to Canada and internationally.
If you're not familiar with BoothActive, the company is run by Timo and has been in the photo booth equipment space for years. They also manufacture and distribute other well-known booths, so this isn't a brand-new player experimenting with a trend. This is an established manufacturer building a product around a trend that isn't going anywhere.
What's Included in the Full Kit
When you order the complete kit, here's what you're getting:
- The enclosed neon booth frame with a built-in screen and black light behind the glass, which is what actually makes the writing glow
- An inside fabric cover
- A brandable outside fabric cover
- A camera mount (camera not included)
- An iPad mount (iPad not included)
- An 8x8 black backdrop with stand
The backdrop is not optional if you want this to look good. A busy or light-colored background makes the glowing writing much harder to see on camera. The black backdrop is what makes the message actually pop.
You'll also get a template for customizing the outer fabric, plus a carry bag for the frame. Note that the glass ships separately in its own box, so hang onto that box for storage and transport.
First Impressions and Assembly
Out of the box, there weren't printed instructions in the bag. This is the one thing you need to check before you start: BoothActive sends an assembly instruction email right after you order, and there's a real chance it lands in your spam or junk folder. Track that email down before you start building, because it makes the process significantly easier.
Assembly itself didn't take long once I had those instructions in hand. It's a tension fabric frame, which naturally raises the question of stability. There's a bar at the base where you can add sandbags for extra sturdiness, though in practice, the booth held steady even with guests actively writing on it. The only caution is not over-tightening the bolts during assembly, since that can strip them.
Setting the camera angle inside took a bit of trial and error, which is true of any pop-up style booth setup. A square frame ended up being the best format for us, since it's the easiest to share and avoids awkward crop issues you'd get with landscape or portrait.
The Real Camera and Lighting Setup
This is where things got technical, and where I think a lot of buyers might get stuck if they're not prepared for some trial and error.
We ran a Canon R100 inside the booth, paired with an iPad for the client-facing interface, running everything off a dummy battery so the camera stayed powered throughout the event. BoothActive does provide recommended camera settings, and we run Snappic for our video booths generally, which worked well here too.
The tricky part was screen brightness. The instructions suggested keeping the glow setting low for the best visual effect, but every camera has a different refresh rate, and low brightness caused flickering on ours. We ended up landing around 75% brightness to eliminate the flicker while still keeping the glow effect intact.
The exact optimal brightness setting will vary by camera model and event environment, so this is a "test before your event" situation, not a fixed number.
Lighting the front of the subject also matters more than you'd expect, since there's no other light source illuminating the person writing. BoothActive has recommended lighting options, though we used three Astera light tubes clamped to the booth's velcro exterior. It worked, but a brighter light source than what we had would likely perform better in low-light venues.
Running It at a Real Event
We took the booth to a high-traffic, prestigious venue with a lot of glass and natural light during the day, which created some early lighting challenges the black backdrop helped offset. As the event moved into evening and the venue's lights were dimmed for a fashion show, we added supplemental lighting to keep the video quality strong.
Despite the lighting shifts, the booth performed well. There was no shake on camera even with continuous guest interaction, and guests intuitively understood how to use it.
One operational decision made a real difference: running the booth with two attendants instead of one. One person managed the iPad, the other directed guest flow. Since guests wrote for varying lengths of time, some leaving quotes, others just signing their name, we used a manual stop button to end each recording at the right moment rather than relying on a fixed timer. That kept the experience feeling tight and avoided dead air in the final videos.
You can absolutely run it with one attendant. We just found two attendants created a smoother guest experience overall.
Pros and Cons
Pros:
- Highly portable, fitting into a single bag plus the glass case
- Fully brandable on the outside fabric
- Easy to assemble, even solo
- Strong visual impact at events
- Reasonable price point given the technology, lighting, and components involved
Cons:
- As a tension fabric structure, it's less sturdy than solid-shell booths
- Not ideal for permanent installs, though one operator has reportedly made it work long-term
- Replacement or branded fabric covers must be purchased directly from BoothActive to guarantee fit, at $647 for the outer cover
- Requires additional lighting equipment not included in the base kit
Should You Add a Scribble Booth to Your Lineup?
If you're looking for a portable, easy to set up, highly brandable add-on that photographs well and gives guests an interactive experience, this is a strong option. It's best suited for events with a booth attendant on-site rather than unattended permanent installs.
We've already started actively marketing this as one of our core offerings for the coming year, largely because the use cases are so broad: guests can sign their name, answer a prompt, or leave a message for someone, all captured as shareable video content.
Frequently Asked Questions
How much does the BoothActive Scribble Booth cost? The full kit runs $3,500 USD as of this review, not including a camera, iPad, or additional lighting equipment.
Does the Scribble Booth ship internationally? Yes. BoothActive is a US-based company that ships to Canada and internationally.
Do I need a backdrop for the Scribble Booth? Yes. The included 8x8 black backdrop significantly improves visibility of the glowing writing on camera, especially against busy or light backgrounds.
Can one person operate the Scribble Booth? Yes, though two attendants create a smoother guest experience, one managing the iPad and one directing guest flow.
What camera works with the Scribble Booth? We used a Canon R100, though any camera compatible with your video booth software should work. Brightness settings will need to be adjusted per camera to avoid flicker.
Is the Scribble Booth good for permanent installs? It's designed primarily for portable use. A solid-shell booth is a better fit for permanent installations, though some operators have used the Scribble Booth long-term successfully.
Where can I buy replacement parts or covers? Directly from BoothActive, to ensure proper fit. A branded outer fabric cover runs $647 USD.
Final Thoughts
If you've been on the fence about scribble booths, this is everything you need to make an informed decision. Test it, price it into your offerings, and see how your clients respond.
Listen to the full episode Apple Podcasts or Spotify, or watch the full review on YouTube.
SUBSCRIBE FOR ALL THE PHOTO BOOTH TIPS.
By subscribing to our newsletter, you consent to receive promotional emails, updates, and other marketing communications from our company. We respect your privacy and will never share your information with third parties without your consent. You may unsubscribe at any time by clicking the unsubscribe link in any email.